Scaper A5
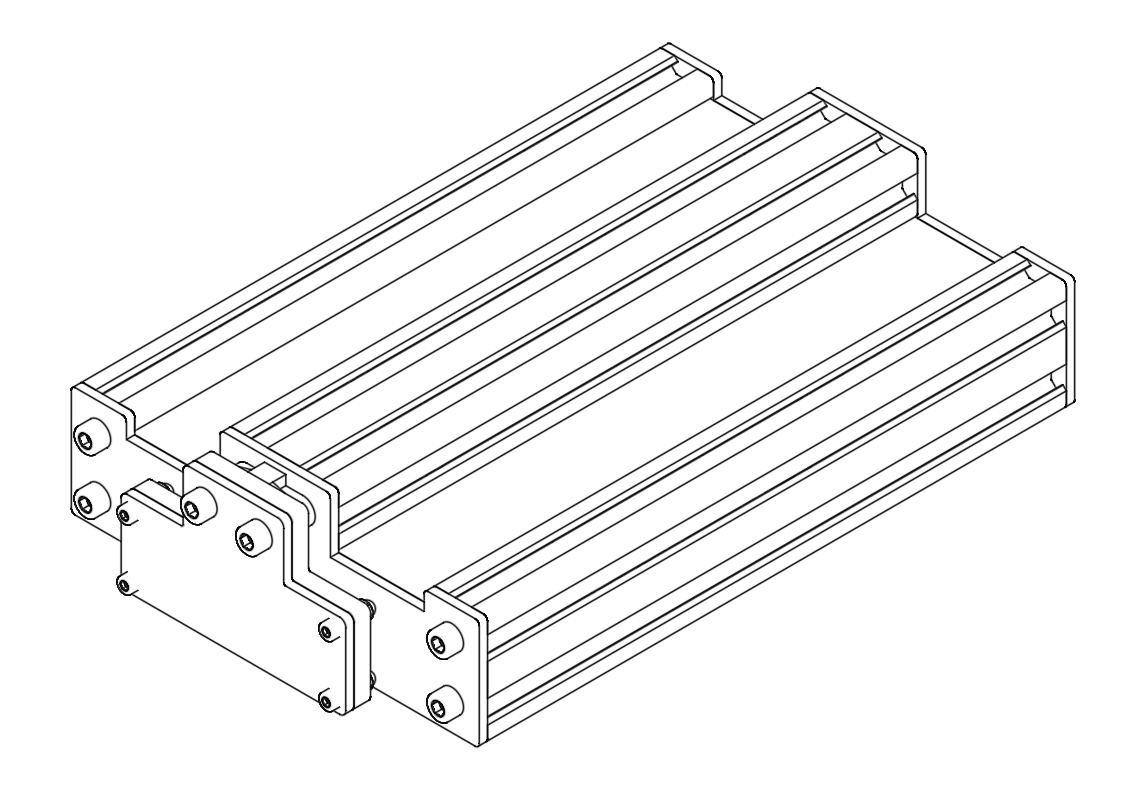
The Scaper A5 lighting system comprises one or more Scaper A5 light fixtures. The designation “A5” in the name denotes its size, which is approximately equivalent to an A5 paper format (148 x 210 mm).
Integrated Controller and Power Requirements
Scaper A5 features an integrated controller and requires a 24V power source. We recommend using a 50-watt power source capable of delivering 2 amps at 24V. Connect the power source to the standard 5.5 DC power barrel socket, with the center pin being positive. Upon powering on, Scaper A5 conducts a brief self-test, indicated by a short, bright flash. The red LED on the controller signifies the power-on state.
WiFi Connection
Before utilizing and controlling Scaper A5, it must be connected to your local WiFi network. Refer to the setup and provisioning section for detailed instructions.
Operating Modes
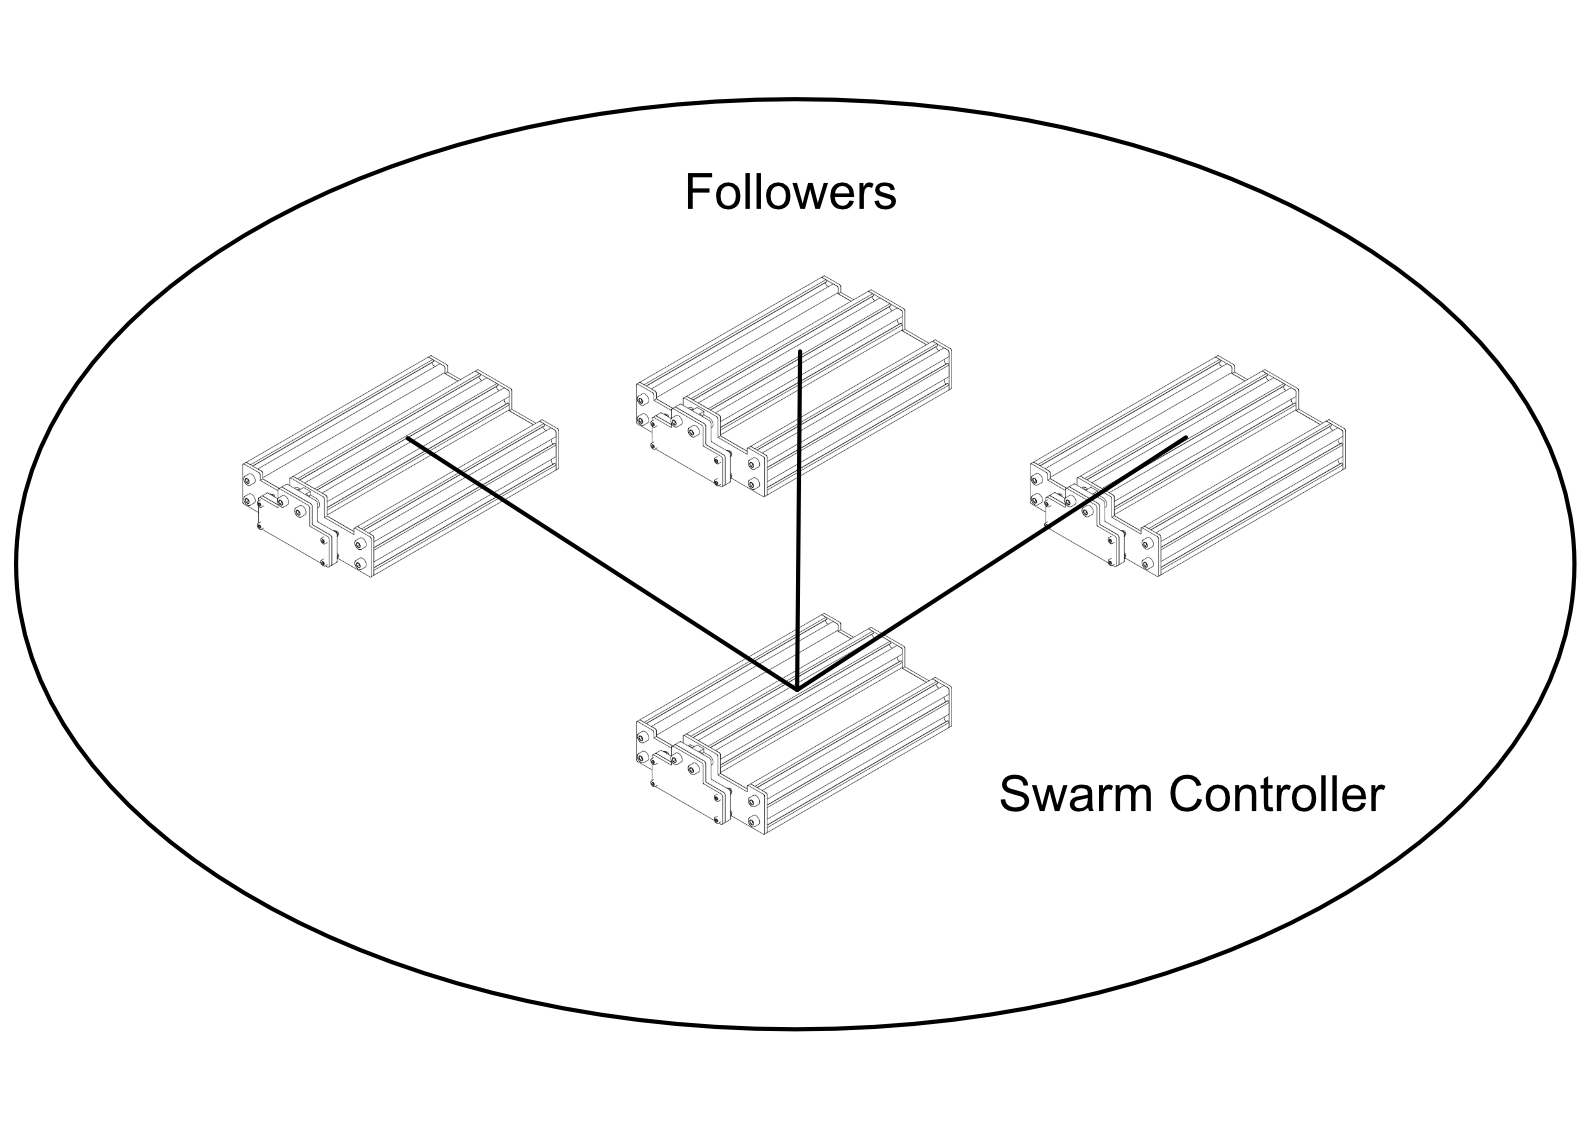
Scaper A5 can function as a standalone light or as part of a “swarm” consisting of multiple lights. Multiple swarms can be configured, each comprising one “controller” and one or more “followers.” Following the setup and provisioning of your Scaper A5 devices, you can proceed to configure your swarm(s).
For more detailed instructions on setup and provisioning, please refer to the section here.
Setup and Provisioning Guide
This section provides a comprehensive guide for setting up and provisioning your Scaper A5. To ensure seamless integration with your local WiFi network, follow the step-by-step instructions below.
WiFi Network Connection
Upon startup, Scaper A5 initiates an attempt to connect to your local WiFi network. It requires the network name (SSID) and a valid password for this purpose. If this information is not available or is incorrect, Scaper A5 will act as an access point, allowing you to provision it with the necessary SSID and password. This process is known as provisioning.
Provisioning Process
An unprovisioned Scaper A5 device starts a temporary private WiFi network. Use your phone, tablet, or desktop computer to connect to this network. Locate the network, named ScaperA5, in your WiFi settings and connect to it without requiring a password.
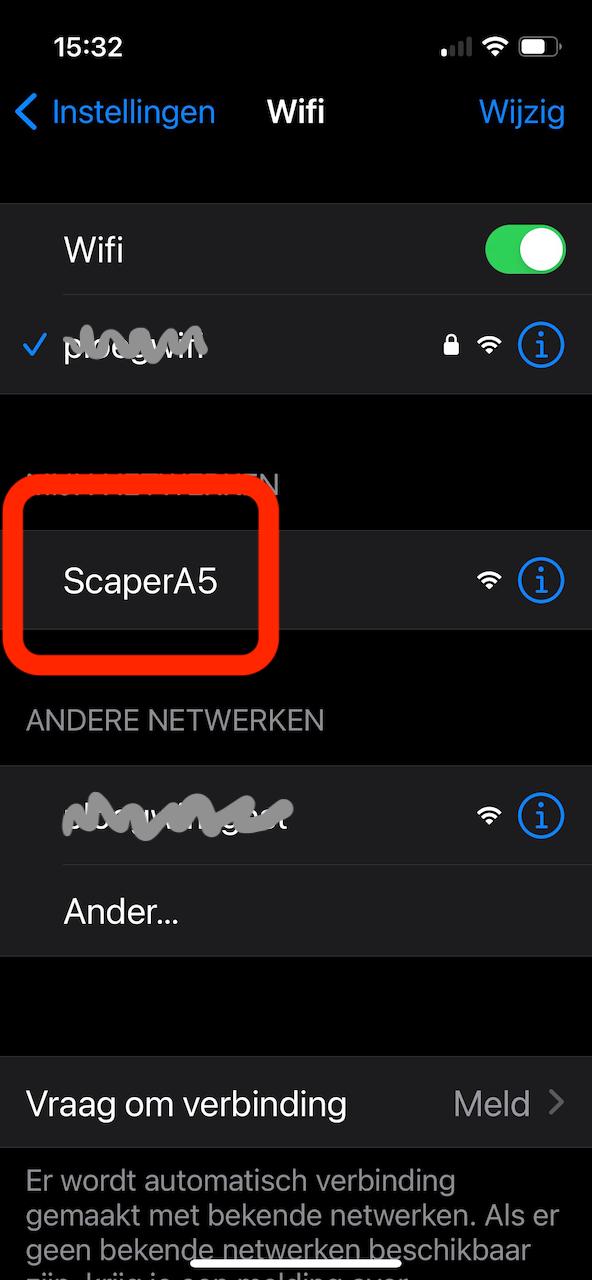
Scaper A5 will appear in your WiFi settings as ScaperA5
After connecting to the ScaperA5 network, your device will attempt to open the Scaper A5 Captive Portal. Android devices may prompt you to “sign in to WiFi network” before accessing the page.
Note: Some older phones or devices may not support captive portal redirecting (e.g., older Android devices). If you are not automatically redirected or prompted to sign in, consider trying a different device. Refer to Trouble shooting Network Setup for further assistance.
The Scaper A5 Network Setup will be displayed:
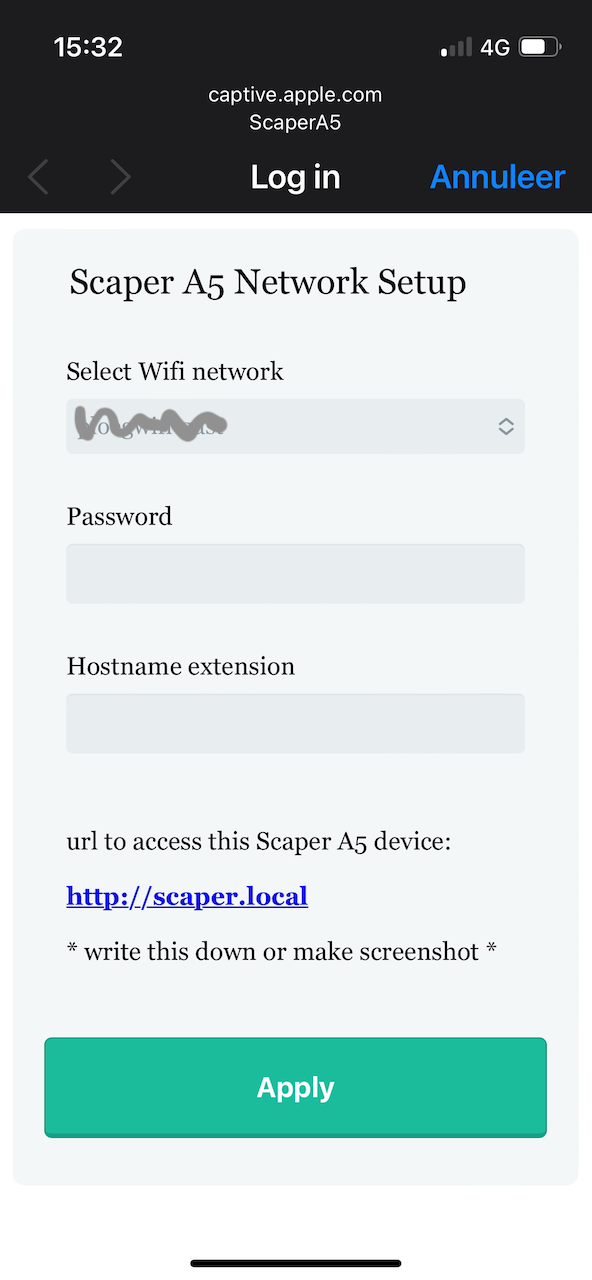
Scaper A5 Network Setup will appear
Here, input the correct credentials for your local WiFi network. Choose the WiFi network from the dropdown list and enter the WiFi password. Optionally, use the Hostname extension to provide a unique name for your Scaper A5. Although not mandatory, this feature is helpful if you have multiple Scaper A5 devices, allowing each one to have a distinct URL. Keep the extension brief, and make a note of it for future reference.
Press the “Apply” button to save the settings to your Scaper A5. After receiving the new settings, the device will reset and utilize the provided credentials to connect to your WiFi network during subsequent startups.
Loading the Application
Once provisioning is complete, you can proceed to load the Scaper A5 App to efficiently manage and control your device. Follow the steps below to access the App through your internet browser (such as Safari or Chrome):
-
Enter the default URL: “scaper.local” into your browser.
- If you provided a name extension during setup, use the format “scaper-extension.local” (replace “extension” with your chosen name extension).
Note: Some older phones or devices may not support “local” (mDNS) URLs, as observed in older Android devices. If the App fails to load, refer to Trouble shooting Network Setup for assistance.
After successfully loading the App in your browser, it becomes fully functional. However, for an optimal full-screen App experience, an additional step is recommended:
-
Save the App to your home screen.
- On iPhone: Open Safari, tap the share button, and choose “Add to Home Screen” from the menu.
- On Android: Open Chrome, Edge, or Firefox, and select “Add to Home Screen” or “Add to Phone” from the menu.
Now, you will have a dedicated App icon on your home screen, providing easy access to the App in full-screen mode.
Trouble shooting Network Setup
Understanding the status of Scaper A5 can be facilitated by monitoring the green LED on Scaper A5 controller. Here is a breakdown of the LED indicators:
- Slow Blink (Once per Second): Indicates that Scaper A5 is attempting to connect to the WiFi network. This occurs at the start, either after a cold start or a reset.
- Medium Blink (4 Times per Second): Suggests that Scaper A5 could not establish a connection and has switched to provision mode. The device will continue to flash at a medium pace until the next reset.
- Fast Blink (20 Times per Second): Signifies that Scaper A5 is in the process of connecting to the WiFi network. This is a transitional state during the connection establishment.
- Steady On: Confirms that Scaper A5 is successfully connected to the WiFi network.
If you encounter issues during the network setup, refer to the LED blinking patterns to gain insights into Scaper A5’s status.
Most Common Cases
After selecting ScaperA5 WiFi network, I don’t get the Captive Portal for entering my Network Setup:
This scenario, observed mostly on older devices (primarily Android), may result in not receiving the Captive Portal prompt for entering network setup. If prompted with “sign in to WiFi network,” tap it to initiate redirection. In cases where the redirect fails, manually type a standard IP address into your browser after selecting the ScaperA5 temporary provisioning WiFi network. Open your Internet Browser and enter “192.9.200.1” in the address/search bar. This will open the Network Settings page, allowing you to enter your credentials as described in the previous section.
After applying your settings, Scaper A5 will reset, causing your phone to lose its connection to Scaper A5. Your phone will likely switch back to your default (strongest) WiFi network. If not, manually set your WiFi connection back to your normal local WiFi.
Using .local (mDNS) names like scaper.local does not work:
Once you’ve provided your WiFi credentials and switched back to your regular WiFi network, you should be able to access your Scaper A5 using your preferred Internet Browser. Ensure that your Scaper A5 is successfully connected to your WiFi network by observing the green LED, which should remain steady (not blinking).
However, if the green LED is on but entering the correct URL does not load the App, your device may not support “.local” (mDNS) names. To resolve this, use the IP address instead of the .local mDNS name. Type the IP address in the browser address/search bar, but first, determine the IP address assigned to your Scaper A5. Install an mDNS discovery tool from the Play Store or App Store, scan your network, and note the IP address of your local devices. Then, use (tap, copy, or type) the discovered IP address into the search/address bar. Some browsers may require the full address, such as “http://xx.xx.xx.xx” (avoid using “https”).
Scaper A5 Application
The Scaper A5 App is hosted directly on the device itself, eliminating the need for downloads from the App Store or Play Store. Compatibility extends to both mobile devices and desktop computers. While mobile devices offer convenience, tasks such as configuring Timer settings may be more efficiently handled on a desktop computer with a larger screen.
For mobile devices, you have the option to add the App to your home screen, creating a regular App icon. This eliminates the need to manually enter the Scaper A5 name each time and ensures a full-screen App experience (Refer to Loading the App).
Operating Modes and Light Channels
Scaper A5 offers two distinct operating modes: manual mode and timer mode. By default, the device is set to timer mode, and to switch to manual mode, you need to use the “Control” switch.

Manual mode
At the bottom, you can toggle between Manual and Timer settings. When selecting Timer settings, the current timer settings are retrieved from the Scaper A5 device. You can then modify these settings and upload the changes.

timer mode
The newly configured settings will take effect after being uploaded to the device. An indicator dot will notify you that design changes have been made but not yet uploaded.

changes not uploaded
Scaper A5 features four light channels:
- Spot Light (Dimmer Only): Utilizes a high-power LED with an optic lens, providing bright and concentrated light.
- Wash Light (Dimmer Only): Employs horticulture-optimized white LEDs for evenly spread light.
- Red Light (Dimmer Only): Utilizes horticulture-optimized LEDs positioned at the far (red) end of the spectrum.
- RGB Light (Dimmer, Color, and Effects): Controls RGB LEDs capable of color changes and producing various effects.
Manual Mode Configuration
In the manual mode, activated through the Control switch, you gain the ability to manually edit the settings for the 4 light channels, and these changes take immediate effect. When you take control, the automatic timer halts, and by default, the timer restarts after 5 minutes. This automatic restart feature ensures continuity in case you forget to manually restart the timer (by switching off control). You can customize this time interval to be one hour or indefinite.

Manual control
In this mode, you can individually edit the 4 channels, and your modifications will be immediately applied. Use the plus/minus buttons or input specific values for brightness. For the RGB light channel, you can also adjust color and effect settings.
Brightness values range from 0 to 100, and color is expressed as a heu value from 0 to 360. Alternatively, you can select one of the base colors from the dropdown menu. Animation effects include options for Wave or Sparkle.

effects
When selecting an effect, you can configure parameters such as Speed and Scale. Experimenting with these values is recommended to understand their impact. Here are suggested settings for creating specific effects:
Red Sunset Effect in Wavy Water:
- Brightness Spotlight: 0
- Brightness Wash light: 0
- Brightness Red light: 10
- Brightness RGB light: 50
- Color RGB light: Yellow (60)
- RGB effect: Wave effect
- Speed: 1
- Scale: 15
Moonlit Night with Subtle Star Twinkle:
- Brightness Spotlight: 0
- Brightness Wash light: 3
- Brightness Red light: 5
- Brightness RGB light: 40
- Color RGB light: Black (0)
- RGB effect: Sparkle effect
- Speed: 90
- Scale: 30
Observing the light directly (underside of the lamp) provides a tangible understanding of the impact of speed and scale.
Timer Settings
When transitioning to Timer settings, you gain the ability to configure all four light channels in relation to time. Each 5-minute timeslot can have specific goal values, and Scaper A5 will gradually adjust towards these set values over time. Timekeeping is facilitated through NTP (Network Time Protocol).
For more comprehensive time schedules, utilizing a desktop computer is recommended. The mobile UI displays only one channel at a time, necessitating switching between channels using the two left/right arrows. In contrast, the desktop UI offers a more comprehensive overview of all four channels.

Mobile UI vs Desktop UI
In both UIs, you can edit a single value by clicking or tapping. To edit multiple values for a time range, hold and drag. This allows you to input a start value and an end value, and the App will automatically fill the intermediate values gradually. Holding past the bottom of the view will scroll to make larger selections. Each channel includes a Delete icon to clear all values for that channel.
Remember to upload the design; a red dot serves as a reminder that changes were made. After uploading, the new values will take effect immediately.

Action menu
Additionally, you have the option to Save your current design (or partial design) to a local file. These files can serve as backups or be reused later on. Furthermore, you can share your design files with other Scaper A5 owners.

Save Dialog
Swarm Configuration
By default, a Scaper A5 functions as a Controller, managing itself without additional configuration. However, when you have multiple Scapers, you can designate them as either a Controller or a Follower (the Role). A Follower seeks its Controller, pairs with it, and then mirrors the actions of the Controller, staying in sync.
The Swarm technology employed ensures minimal impact on your WiFi network, utilizing direct peer-to-peer networking. However, for certain functionalities, peers must be connected to the same WiFi access point (router). If multiple access points are in use, ensure all Scaper A5 devices in the same Swarm are connected to the same access point.
To identify surrounding Scaper A5 devices, use “Other Scaper A5 Devices” from the action menu:

Other Scaper A5 Devices
The dialog displays discovered Scaper A5 devices and their Role. If a device is set as a Follower but hasn’t yet paired with its Controller, it will show “Failed,” which may occur when the Controller is not yet switched on.
You can filter on Peers for the currently connected device. If the current device is a Controller, it will display its Followers. Clicking or tapping on a device takes you to that Scaper A5, connecting your App for control or management.
If the connected Scaper A5 is a Follower and its Controller becomes active later, you’ll receive a confirmation when your Follower device successfully pairs with its Controller:
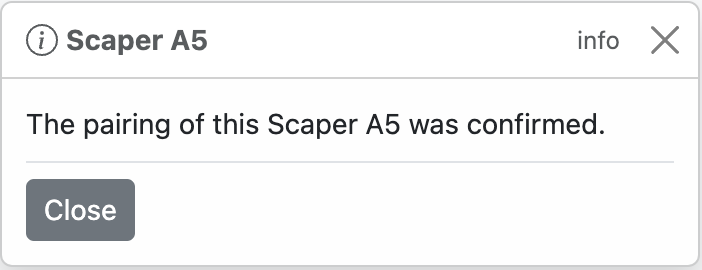
Pairing Confirmed
Once paired, you can no longer manually control your Scaper A5; it is now in Follow Mode and can only be controlled from its Controller. Your App will reflect this:
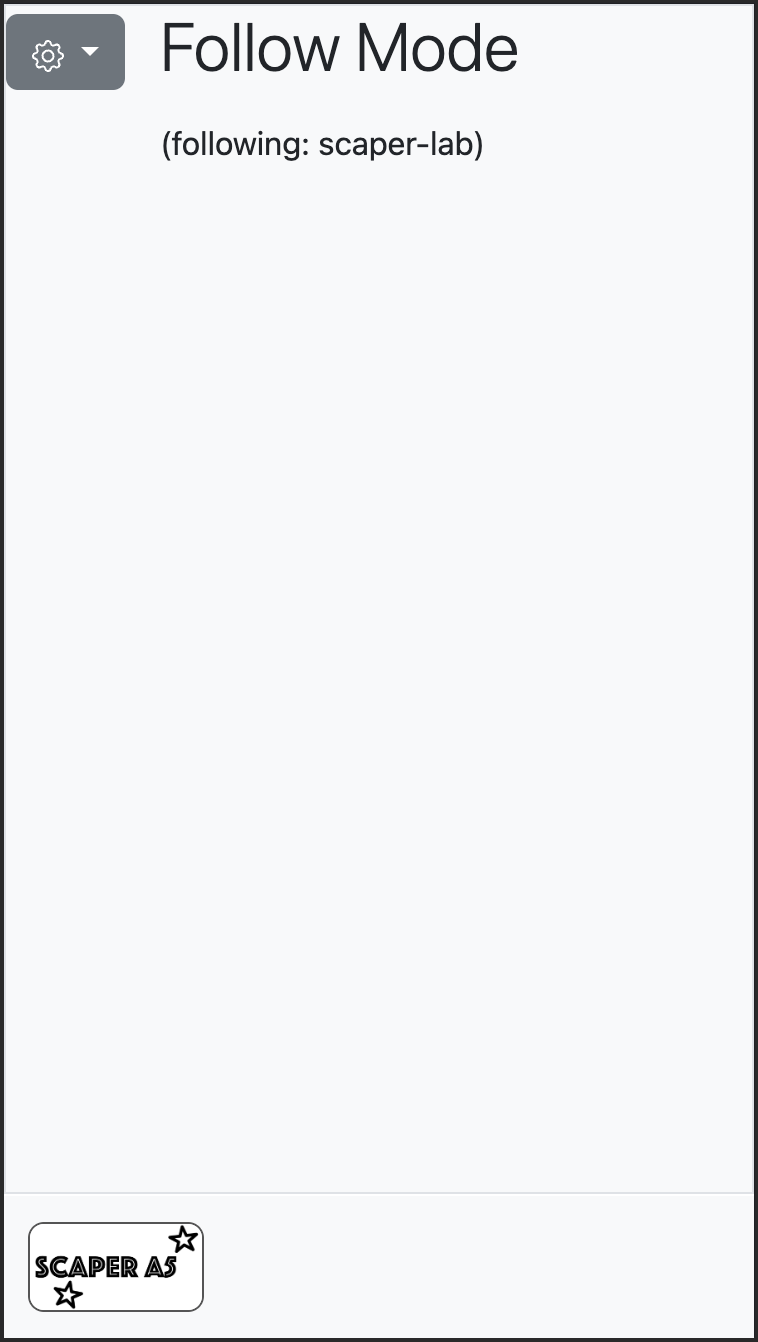
Follow Mode
To configure a Scaper A5 as a Follower, select Pairing Settings from the action menu. Here, you can view the current pairing status and select a Controller to follow:
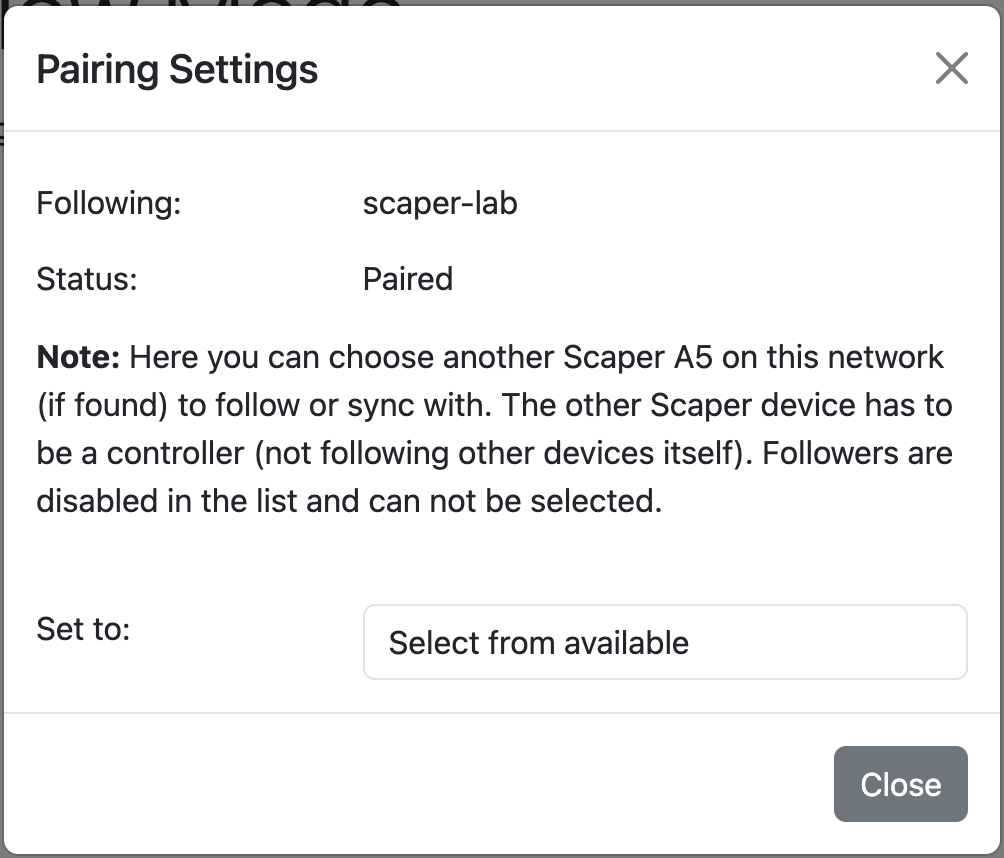
Pairing Settings
Network and Time settings
Scaper A5 connects to your local WiFi network to serve the control Application and also to fetch and synchronize time using a time server over the internet. For this to work Scaper A5 needs to login to your WiFi network and be allowed to access the Internet.
Network Settings
Choose Network Settings from the action menu to modify your WiFi network configuration. This reveals the current Network Settings, and selecting Reset Network Settings navigates you to the Provisioning dialog, allowing changes to your WiFi network and name extension for your Scaper A5:
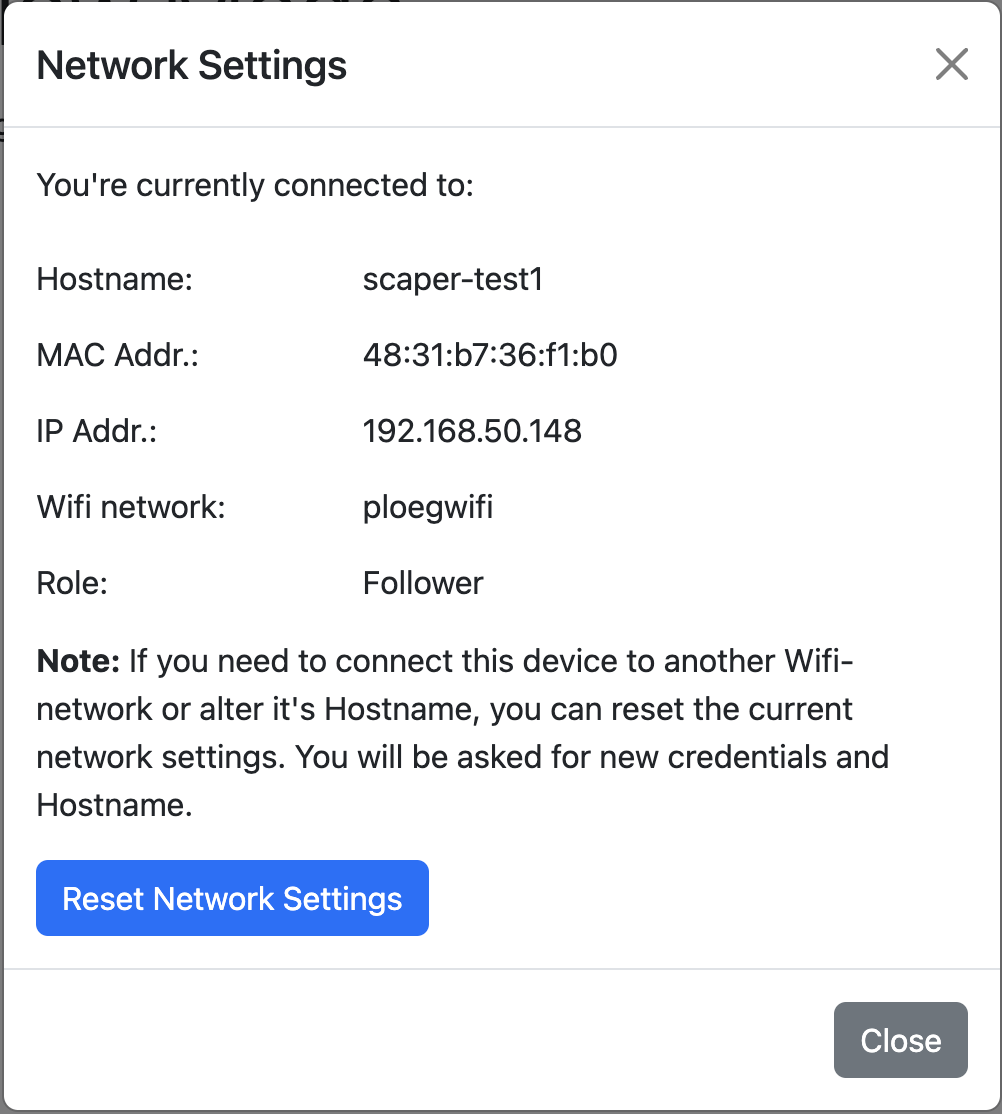
Network Settings
Time Settings
Using the Time Settings dialog, you can set the time server to use for synchronizing the exact time. The default time server url is pool.ntp.org. This will work best in most cases as it forwards requests to a nearby time server in your region.
The Posix Timezone String is used to manipulate the fetched time, which by default is the UTC time. Most computers use a Timezone string to convert UTC time to your local time. It contains settings for offset and Daylicht Saving settings. You can lookup your Timezone string, there are several references and lists on the Internet or you can construct one using a provided configuration wizzard (the gear button). However, in most cases you don’t need to do anything as Scaper A5 will always try to infer your local time settings from your phone or computer during provisioning. It will construct a Posix Timezone String which in most cases is correct.